


Key Steps
1.
2.
3.
4.
5.
6.
Download and open the template
Add your own footage
Insert your logo
Edit and customise your texts
Adjust Settings layer
Produce your video
0 : 19
0 : 38
1 : 27
1 : 55
2 : 30
2 : 48
2.
3.
4.
5.
6.
Add your own footage
Insert your logo
Edit and customise your texts
Adjust Settings layer
Produce your video
0 : 38
1 : 27
1 : 55
2 : 30
2 : 48
Tips and Tricks
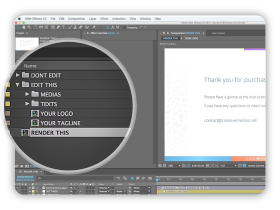
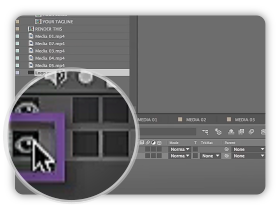
Project Panel
Place your footage in this panel and
navigate into the different compositions.
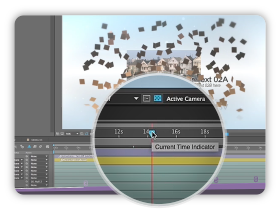
Current Time Indicator
Displace this locator to preview
your project without rendering it.
Eye button
Click on this button to toggle
on or off a specific layer.
Tutorial Transcript
In this tutorial, we will show you how to personalize our templates with your own footage, logo and texts. In this example, we will use the template Dynamic showcase. First you have to extract all the compressed files in a folder on your computer. Then open the After effects template : it is the file with the .aep extension. Now you need to bring your footage and logo in After Effects. Simply select your files on your computer and drag them in the folder panel located on the left of the After effects window.
Once it is done, open the Media folder, select one of your videos and drag it onto the Media 01 composition. On the central panel, you can displace or rescale your footage if needed. Here’s a trick for you : press and hold shift to keep the original ratio of your footage when you are rescaling it. Proceed like this with your other media. When you go back to the Render this composition on the bottom of the screen, you can see that the project is now updated with your footage.
Let’s take care of your logo now! Go back in the folder panel, select your logo and drag it onto the logo composition. To get rid of the “Your logo” text, click on the eye picture on the bottom left of the screen. Rescale and adjust the position of your logo as you wish. Then go back at the end of the Render this composition and see how it looks.
Finally open the Texts folder in the Folder panel. Double-click on the Text 01 composition. If you can’t see the text, simply click on the timeline, it will appear in the central panel. Now use the Text tool to edit your text. You can also change the font and color in the Text panel on the right of the screen. Proceed with the other texts compositions. When you are finished, go back to the Render this composition and see your project update.
In many of our projects, there are customization options that allow you to easily change some elements of the template, such as background colors and so on.
To do so, be sure to check the Settings layer. Select it, and in the effect panel, adjust the parameters.
When you are ready to render the video, go into Composition, Make movie. You have now to select the video format, here I’m choosing a Quicktime movie, to set the location and to choose the name of your video. Finally press the render button. We hope this tutorial has been useful for you. Feel free to contact us if you have any questions. Thanks for watching.
Comments are closed.